Chapter
21b2
Infinity Aerospace Gear Installation
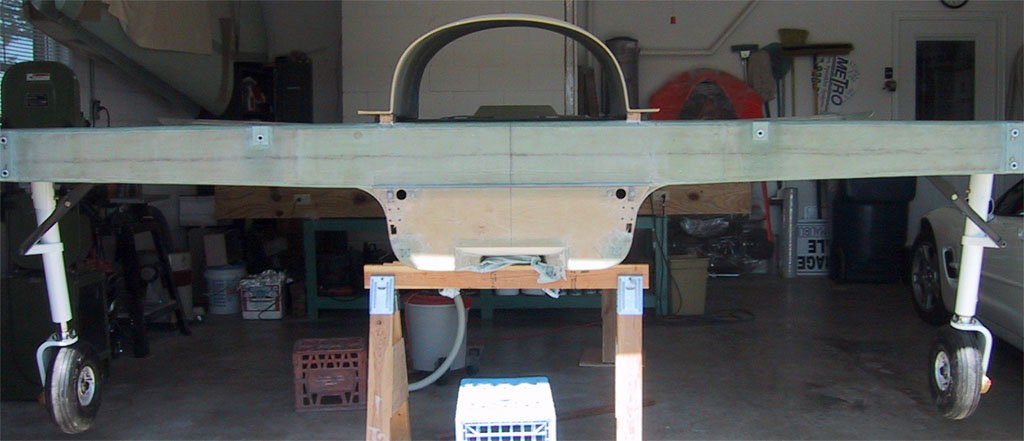
Mounting the Gear
Actually mounting
the gear is no big deal provided you did one small thing prior to mounting the
center section spar into the fuselage... drill the 2" diameter holes for
the trunion pins in the front face of the spar using a drill press.
Next we went through a process of clamp the gear to the spar and adjusting very
carefully to make sure the gear will retract within the strakes, but no further.
Allowing for gear door thickness. Excess retraction depth will cost you fuel.
Once the optimal position was found the spar is drilled for the 9 bolts per
side. The best way to go about this is to start the holes with an appropriate
size drill or center drill, remove the mounting plate and using one of those
sliding fixtures you clamp on a drill to drill the holes square to the face of
the spar. For each screw a nut plate needs to be fashioned from an anchor nut
and large area washer. These are reserved to be floxed in later. Until the final
installation of the gear it is simpler to use common hardware store fasteners.
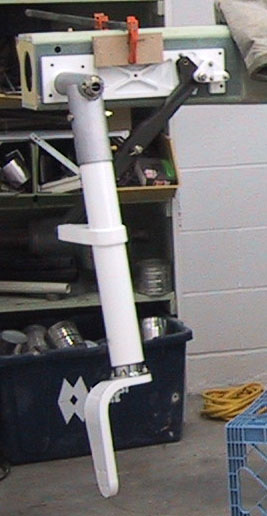
The actual trunion goes clear through the gear mounting plate to the rear of the
spar and connects to the rear trunion support plate held in place by two longer
wing bolts. The plate is held in place by an additional pair of AN-3 bolts for
when the wing bolts may be removed.
With both gear bolted in place we checked where our axels were, we came out .5" aft of the plans target with no load. We expect with hydraulic pressure and actually sitting on the tires, the oleos slightly extended it will be exactly on target. As of 3-07-05 the plane has never been on any of its gear.
On with the
show:
1 Spar preparation
3 Strake modifications specific to the landing gear
4 Routing the hydraulics
5 Gear doors